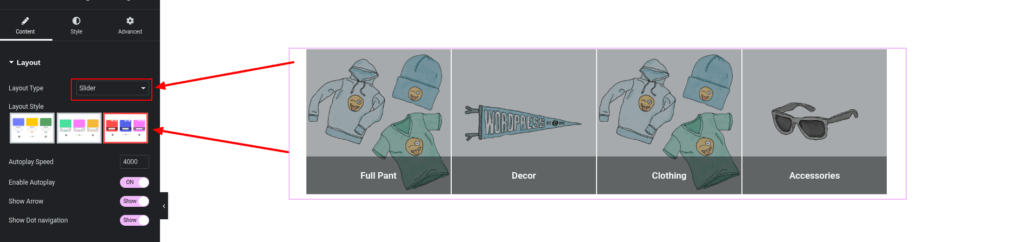
The Slider Layout option in the Dynamic Product Category Grid, Slider for WooCommerce plugin lets you showcase product categories in an engaging, scrollable format. This guide will walk you through configuring the slider layout using Elementor, as shown in the image below.
Step 1: Open the Elementor Page Builder
Start by editing the page where you want to insert the category slider:
- Go to Pages > Add New or open an existing page.
- Click Edit with Elementor to launch the Elementor editor.
Step 2: Add the Product Categories Design Widget
Inside Elementor:
- Go to the Widgets panel.
- Search for Product Categories Design.
- Drag and drop the widget onto your page.
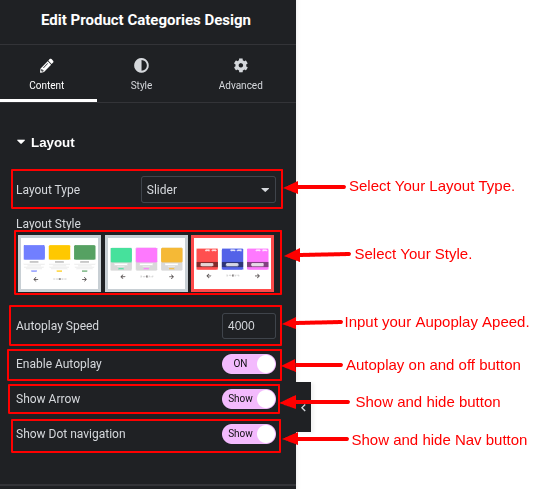
Step 3: Configure the Slider Layout
Once the widget is added, configure the slider settings:
- Layout Type:
Select Slider from the Layout Type dropdown. - Layout Style:
Pick a visual style for your slider from the available options. - Autoplay Speed:
Enter the speed (in milliseconds) at which the slider should transition between categories (e.g.,4000= 4 seconds). - Enable Autoplay:
Toggle this option ON or OFF to automatically play the slider. - Show Arrow:
Choose whether to Show or Hide the navigation arrows on the slider. - Show Dot Navigation:
Select Show to display dots for navigation, or Hide to remove them.
Step 4: Customize Style (Optional)
Use the Style tab to refine the visual design:
- Adjust padding, margins, and gaps between items.
- Change background, text colors, and hover effects.
- Customize arrow icons and dot navigation styles.
Step 5: Save and Preview
- Click Publish or Update to save the page.
- Preview the page to ensure the slider appears and functions as expected.
- Tweak any settings if necessary for improved appearance or performance.